Jun 9th 2020
How to Install a DuraVent Snow Splitter
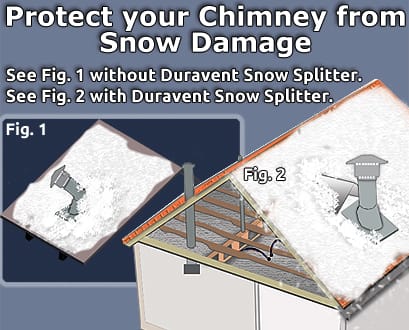
If you live in an area that has heavy snowfalls or you have a metal roof your chimney is at risk for snow damage. Sliding snow will slam into your Class A Chimney and can, and most likely will, cause serious damage even to the point of no repair.
Don't you wish that there was a simple way to Protect your investment into your chimney? There is, the Duravent snow splitter! This simple contraption is actually a snow break that cuts the sliding snow like a knife, saving your chimney from expensive time consuming damage. Read more below on how you can protect your chimney in just for simple steps with a snow splitter.

Step 1:
The first step is to assemble the snow splitter. The snow splitter comes
in two pieces so all you have to do is slide the two triangular pieces together.
Step 2:
Once you have your snow splitter assembled the next step is to place the
snow splitter into position. For best results, position the snow splitter
on the roof with the center of the snow splitter aligned with the center line of the chimney
pipe. Maintain a 2” to 3” gap between the chimney and the
snow splitter. If possible, Extend the snow splitter at least 3” beyond sides of flashing
and at least 6” higher than the flashing cone.
Step 3:
Secure the snow splitter to the roof using #10 or heavier
screws sufficiently long to insure that the fastener is adequately
secure to the roof. Do not tighten screws down completely.
Step 4:
Before tightening the fasteners apply silicone or
similar weather proofing sealant under each tab to seal the screw
hole in the roof.

