Jun 8th 2020
How to Install a DuraVent Extended Roof Bracket
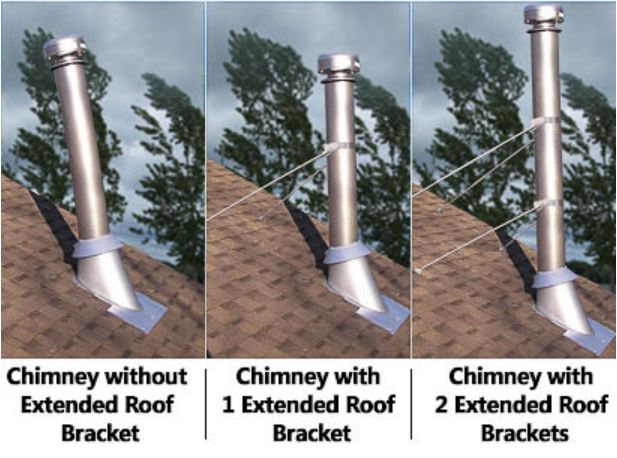
An Extended Roof Bracket is used to support the chimney when it extends more than 5' above the roof. It provides stability to the chimney against wind and snow.
If your chimney extends more than 5' above your roof line you will need to install an extended roof bracket. It is recommended to install an extended roof bracket at every 5' increment of your chimney leaving no more than 5' above the last bracket. Duravent's Extended Roof Bracket includes the pipe band, adjustable legs, and the roof mounting brackets. You will need to provide the hardware to attach the mounting brackets to you roof.

Step 1:
The first step in installing your extended roof bracket is to mount the pipe
band. This is done by simply slipping the chimney pipe and securing it into
place with the provided nut and bolt.
Step 2:
Once you have mounted the pipe band you will
need to assemble the legs. To allow for adjustable length from 67" to 114",
the legs are in two halves. Slide the inner half into the outer half and
secure one end of each leg to the pipe band with the provided nuts and bolts.
Position the legs so that they for approximately a 60 degree angle with the
chimney and with each other. Mark where the mounting brackets will be attached
to the roof. If your chimney is leaning you may need second person to hold the
chimney straight while you are determining your positioning.
Step 3:
Once you have determined the positioning of the legs you need to secure the
legs at the desired length. In order to secure legs into the proper position;
there is a hole provided in the outer leg where the two halves overlap. Be
sure that there is at least 3" of overlap between the top and halves of the
adjustable legs. Use a 1/4" drill bit to drill through the inner leg at that
location. Use the provided nut and bolt to keep the adjustable legs in
position.
Step 4:
referencing the marks that you made while
positioning the legs mount the two roof brackets where the legs meet the roof.
You will need to provide four 1" roofing nails or screws per bracket. Before
completely tightening the brackets down seal the screw, or nail, heads with a
non-hardening, waterproof sealant.
Step 5:
attach the bottom end of the adjustable legs to the roof brackets using the
provided nuts and bolts.
Step 6:
Your extended roof bracket installation is complete! We recommend checking the
seal where your chimneys storm collar meets the flashing. If you had to shift
the position of your chimney at all this seal may have been damaged and if
left untouched could lead to a leak and damage to your ceiling. If you notice
any areas that require resealing use your silicone to reseal the area(s).

